In this Entry, I will be talking about the various Mechanical Switches one can find in Mechanical Keyboards, generally pre-built ones, along with the Customization options and how one can Create their own Keyboard.
As apart of my first Entry, I briefly talked about the 3 "keyfeels" of Mechanical Switches and had some examples, along with a couple videos to explain in more detail.
Before I get more into this, I will say that many people on r/MechanicalKeyboards on Reddit who are just getting into the hobby will tend to ask "What is the Best Keyboard/Switch I can buy?". The question however is null as everything within this hobby is purely subjective so there is no such thing as "Best".
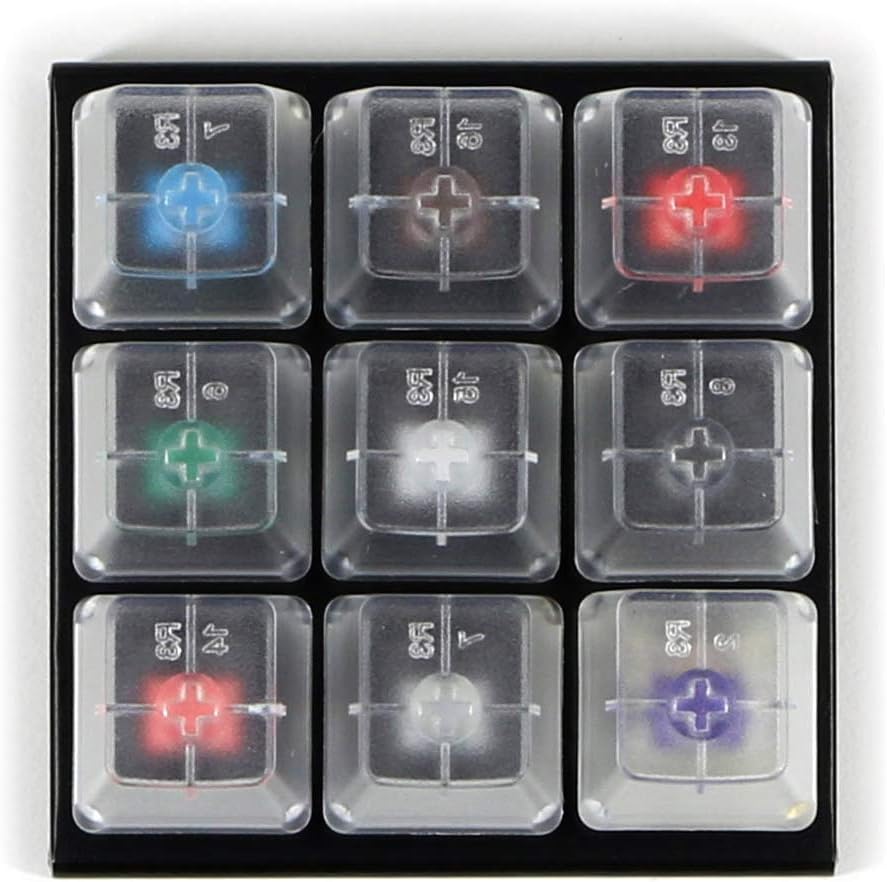
If you're unsure of what kind of Switch you want for your Keyboard, Switch Testers are the Answer. WASD and Max Keyboard offers a small selection, as does MechanicalKeyboards.com
A 9 key tester from WASD
Another important thing I should add well is Switches generally come in 2 Mounting Options. PCB Mount, and Plate Mount. PCB Mount uses 5 pins, while Plate uses 3 pins.
Here is a picture showing the differences with 2 Cherry MX Switches
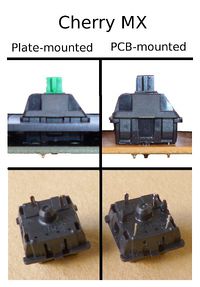
If you ever accidentally buy PCB mount Switches for a Plate Mount keyboard, that can be remedied by using flush cutters and cutting off the 2 rear legs to make it a 3 pin (see the above photo for reference)
There are many companies that produce Mechanical Switches: Cherry, Gateron and Kailh (a subsidiary of Kaihua) are the 3 most Popular Brands that produce Mechanical Switches that people will go to. There are others such as Outemu, KBT, and Greetech that have their own Clones, along with Razer and their own in-house Switches, currently manufactured by Greetech. A Company based here in British Columbia, ZealPC, has his own Switches. Some switches have rubber dampeners on the Stem to help reduce sound when the stem hits the top and bottom of the switch housing.
Here's a 3D Render in GIF Form for a better picture of whats described:

(Source: Cherry MX Silent Red Switches)
Switches by Cherry found in many Pre-Built Keyboards will be Cherry MX Red, Blues or Browns, and often Silvers.
Some people will often lube their Switches to help make it be smoother then pressing and it can also help get rid of any additional noise.
Many use Kryotox lubricants as many of their products are rated for use on plastic and work perfectly. Another good alternative is SuperLube.
Here is a Deskthority page on it: Lubrication - Deskthority wiki
Many people will also clip and lube the Stabilizers for the longer keys (Spacebar, Shifts, Enter, and Backspace keys along with the +, 0 and Enter keys on the Numpad section if available) so they're quieter, as they generally rattle and make sound upon pressing down.
Here are a couple Youtube videos detailing how one can do both these from another favourite Youtuber of mine who deals with Mechanical Keyboards, Nathan Kim:
Customization
Here I'll dive into the Customization aspect, where Backlights, Underglow and Keycaps will fall into place.
Backlights
Many people prefer to have their keyboards backlit for easier reading at night or aesthetic purposes, or both. These are done with either LEDs which are typically 3mm in size or with SMD LEDs, both of which are soldered to the PCB. The LEDs are generally more popular as SMD LEDs are far tinier and require a more precise hand to solder. They can be either mono coloured or multicoloured or even RGB and can be controlled from either the Keyboard itself via programming if hand built or if bought from a company like Corsair, using special Software created by the company.
Underglow
Similar to above, however the only way to achieve this is by using 1.8mm LEDs and buying something such as KBDfans' Tina kit or Sentraqs own DIY kit and selecting the translucent case option. The glow can again be either mono coloured or RGB and be controlled by on-board programming using a program called QMK to program it to do these actions. (QMK is only for hand built boards and cannot be used with 3rd party keyboards, unless you switch out the controller board to something such as a Pro Micro and re-wire everything yourself)
Key Caps
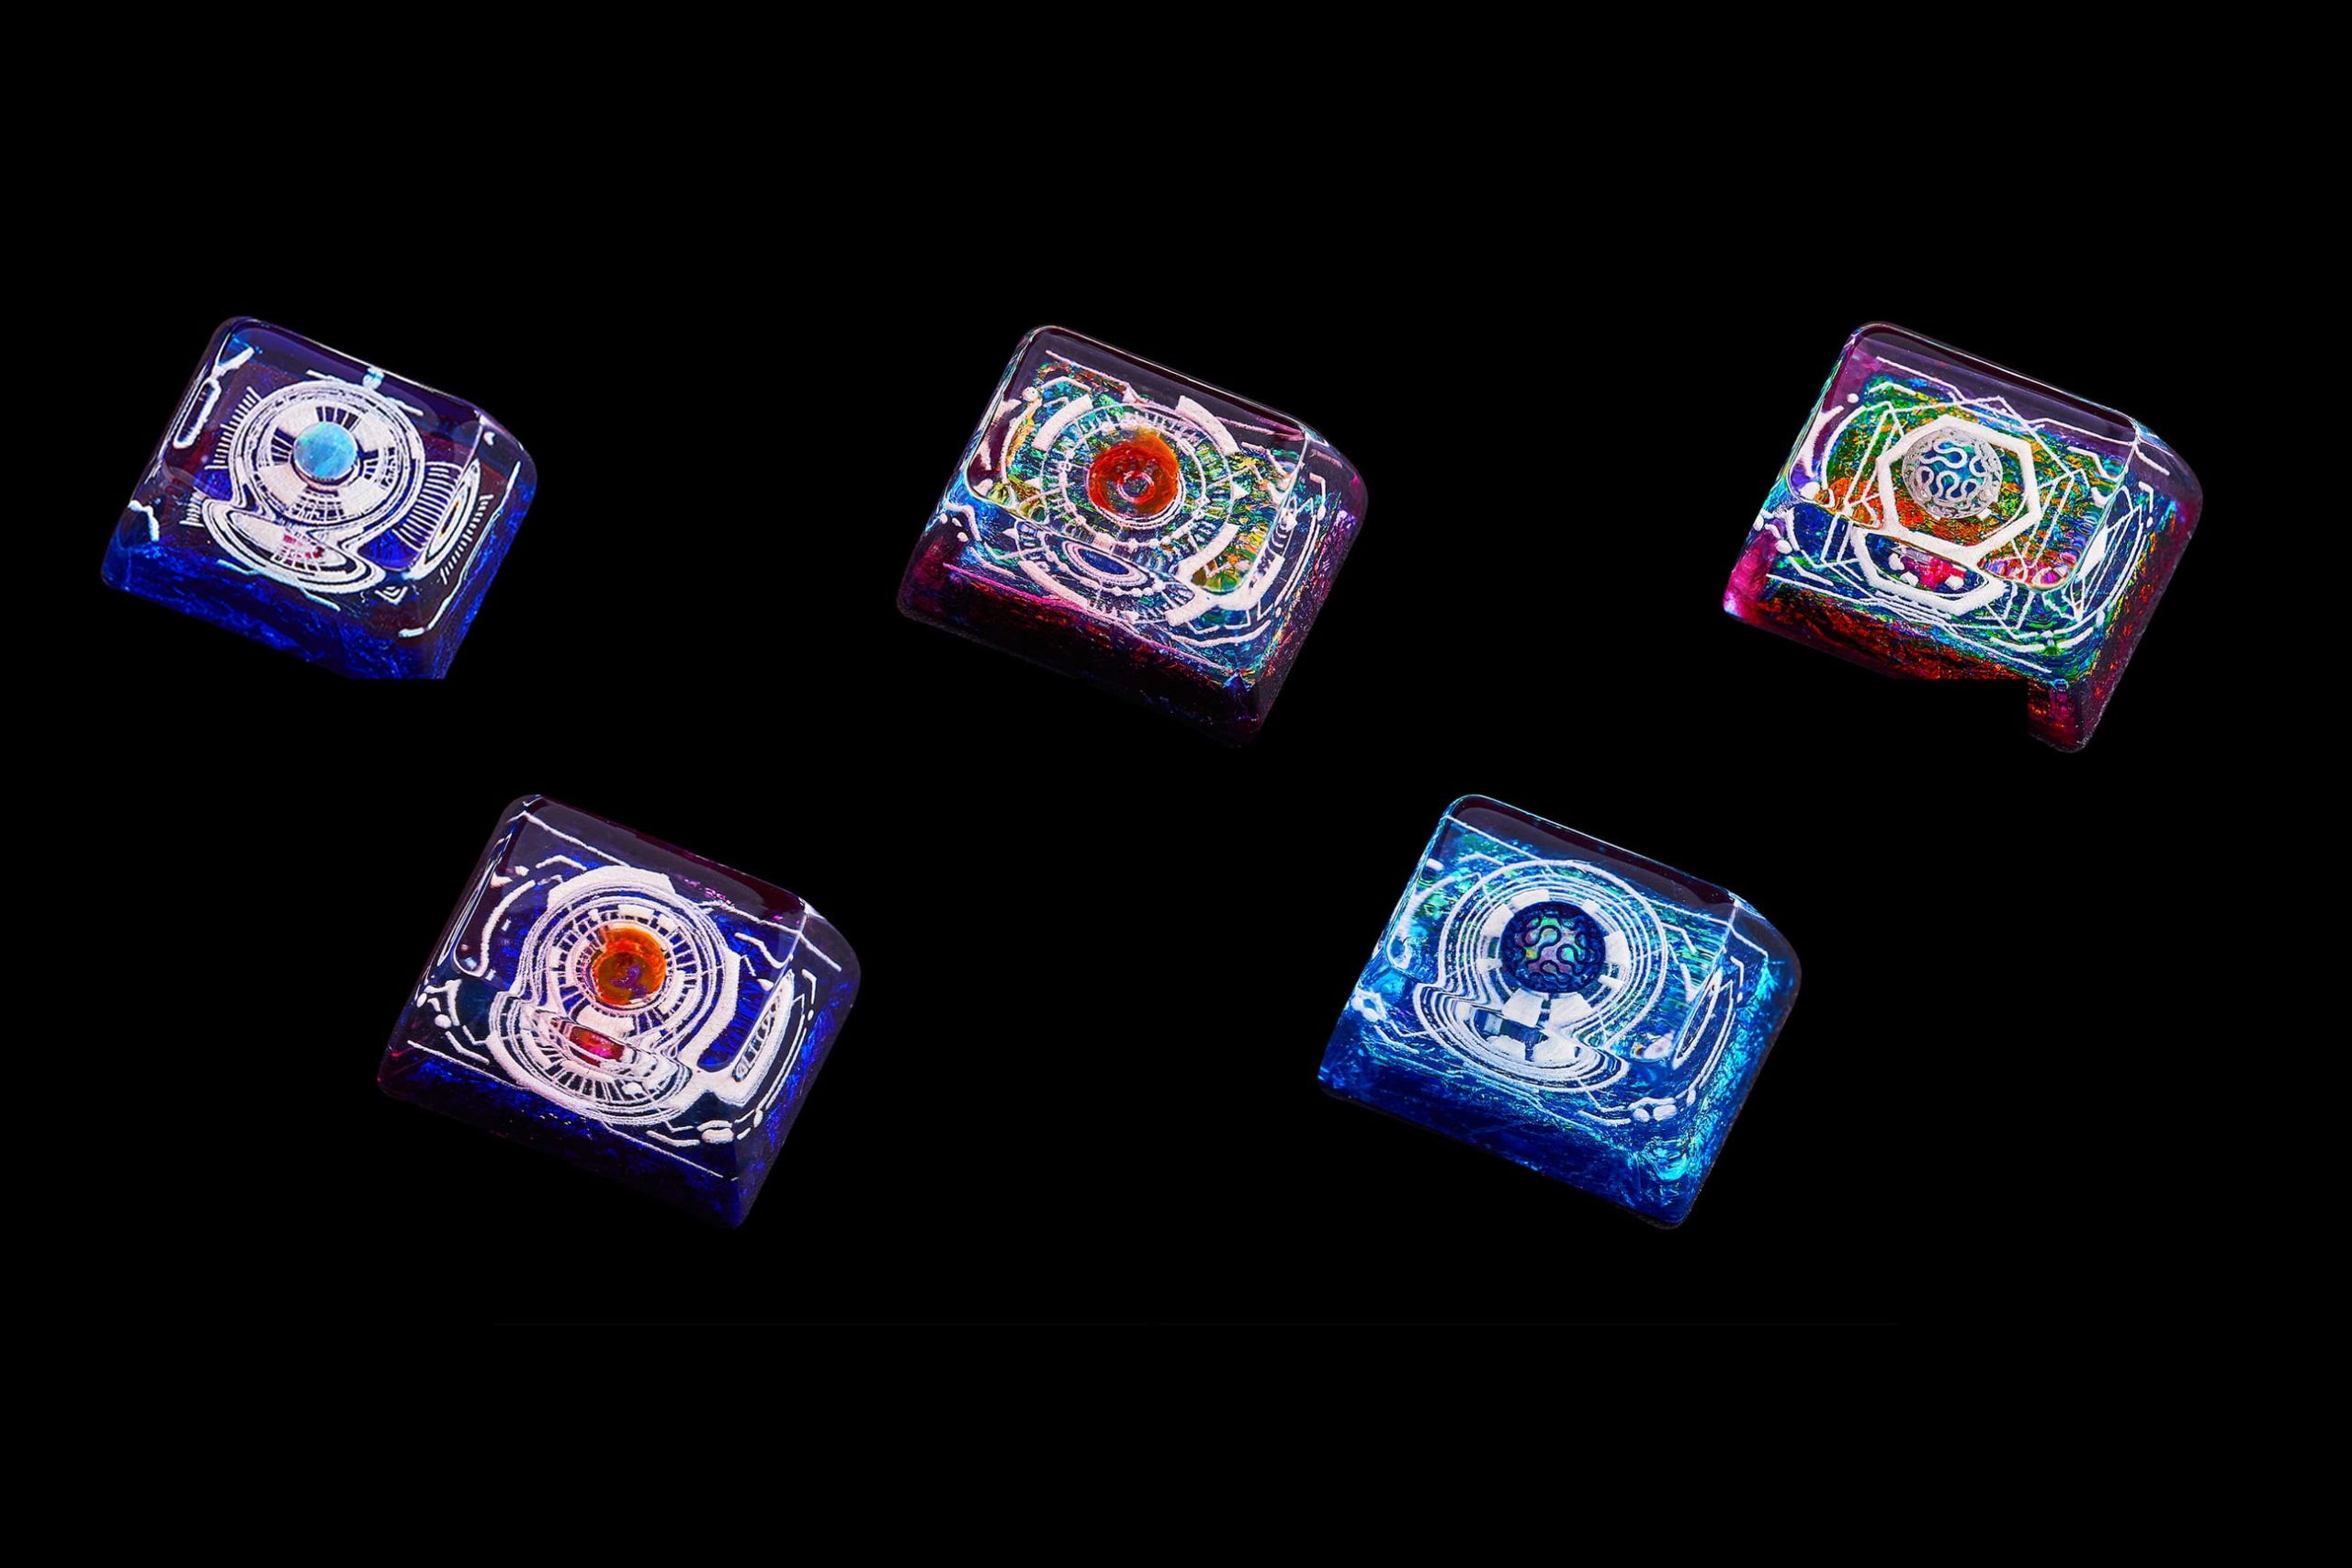
This is where things get a little more interesting. Key Cap Sets are diverse and many are quite exotic looking, especially when it comes to Artisan Keycaps, which sound exactly as it is. People will typically use Resin to create their own Key Caps to sell. A popular Company that does this is called Jelly Key who host Group Buys (which is again exactly as it sounds; people sign up to get something and the person/people manufacture as many as there are signers and then send them out when its time which is generally several months ahead due to costs and manufacturing time)
Here is an example of several such Artisan Key Caps from Jelly Key from their Cosmos series.
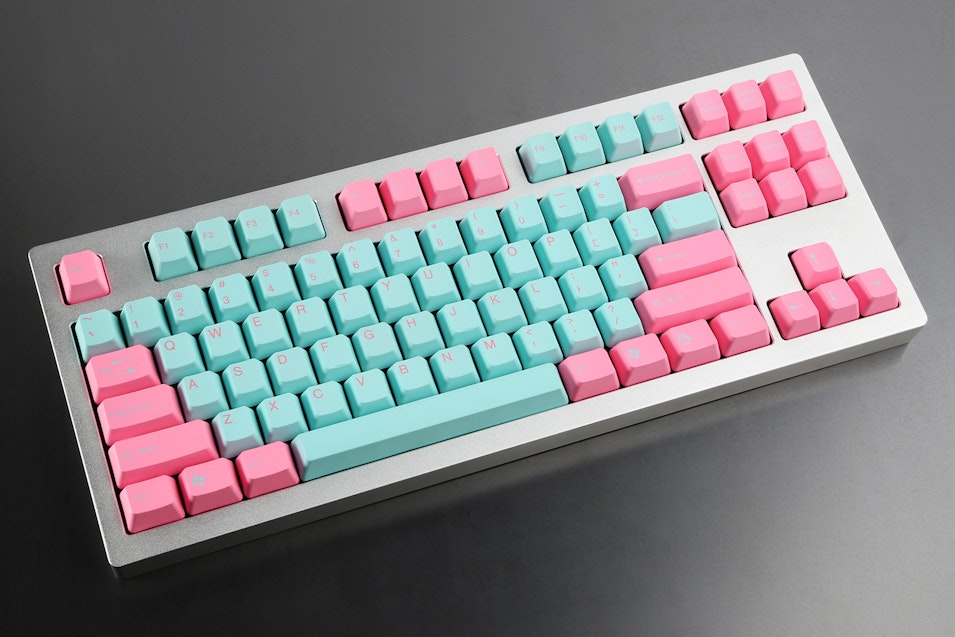
Key Caps also come in regular looks as well. Here are a select personal favourites of mine:
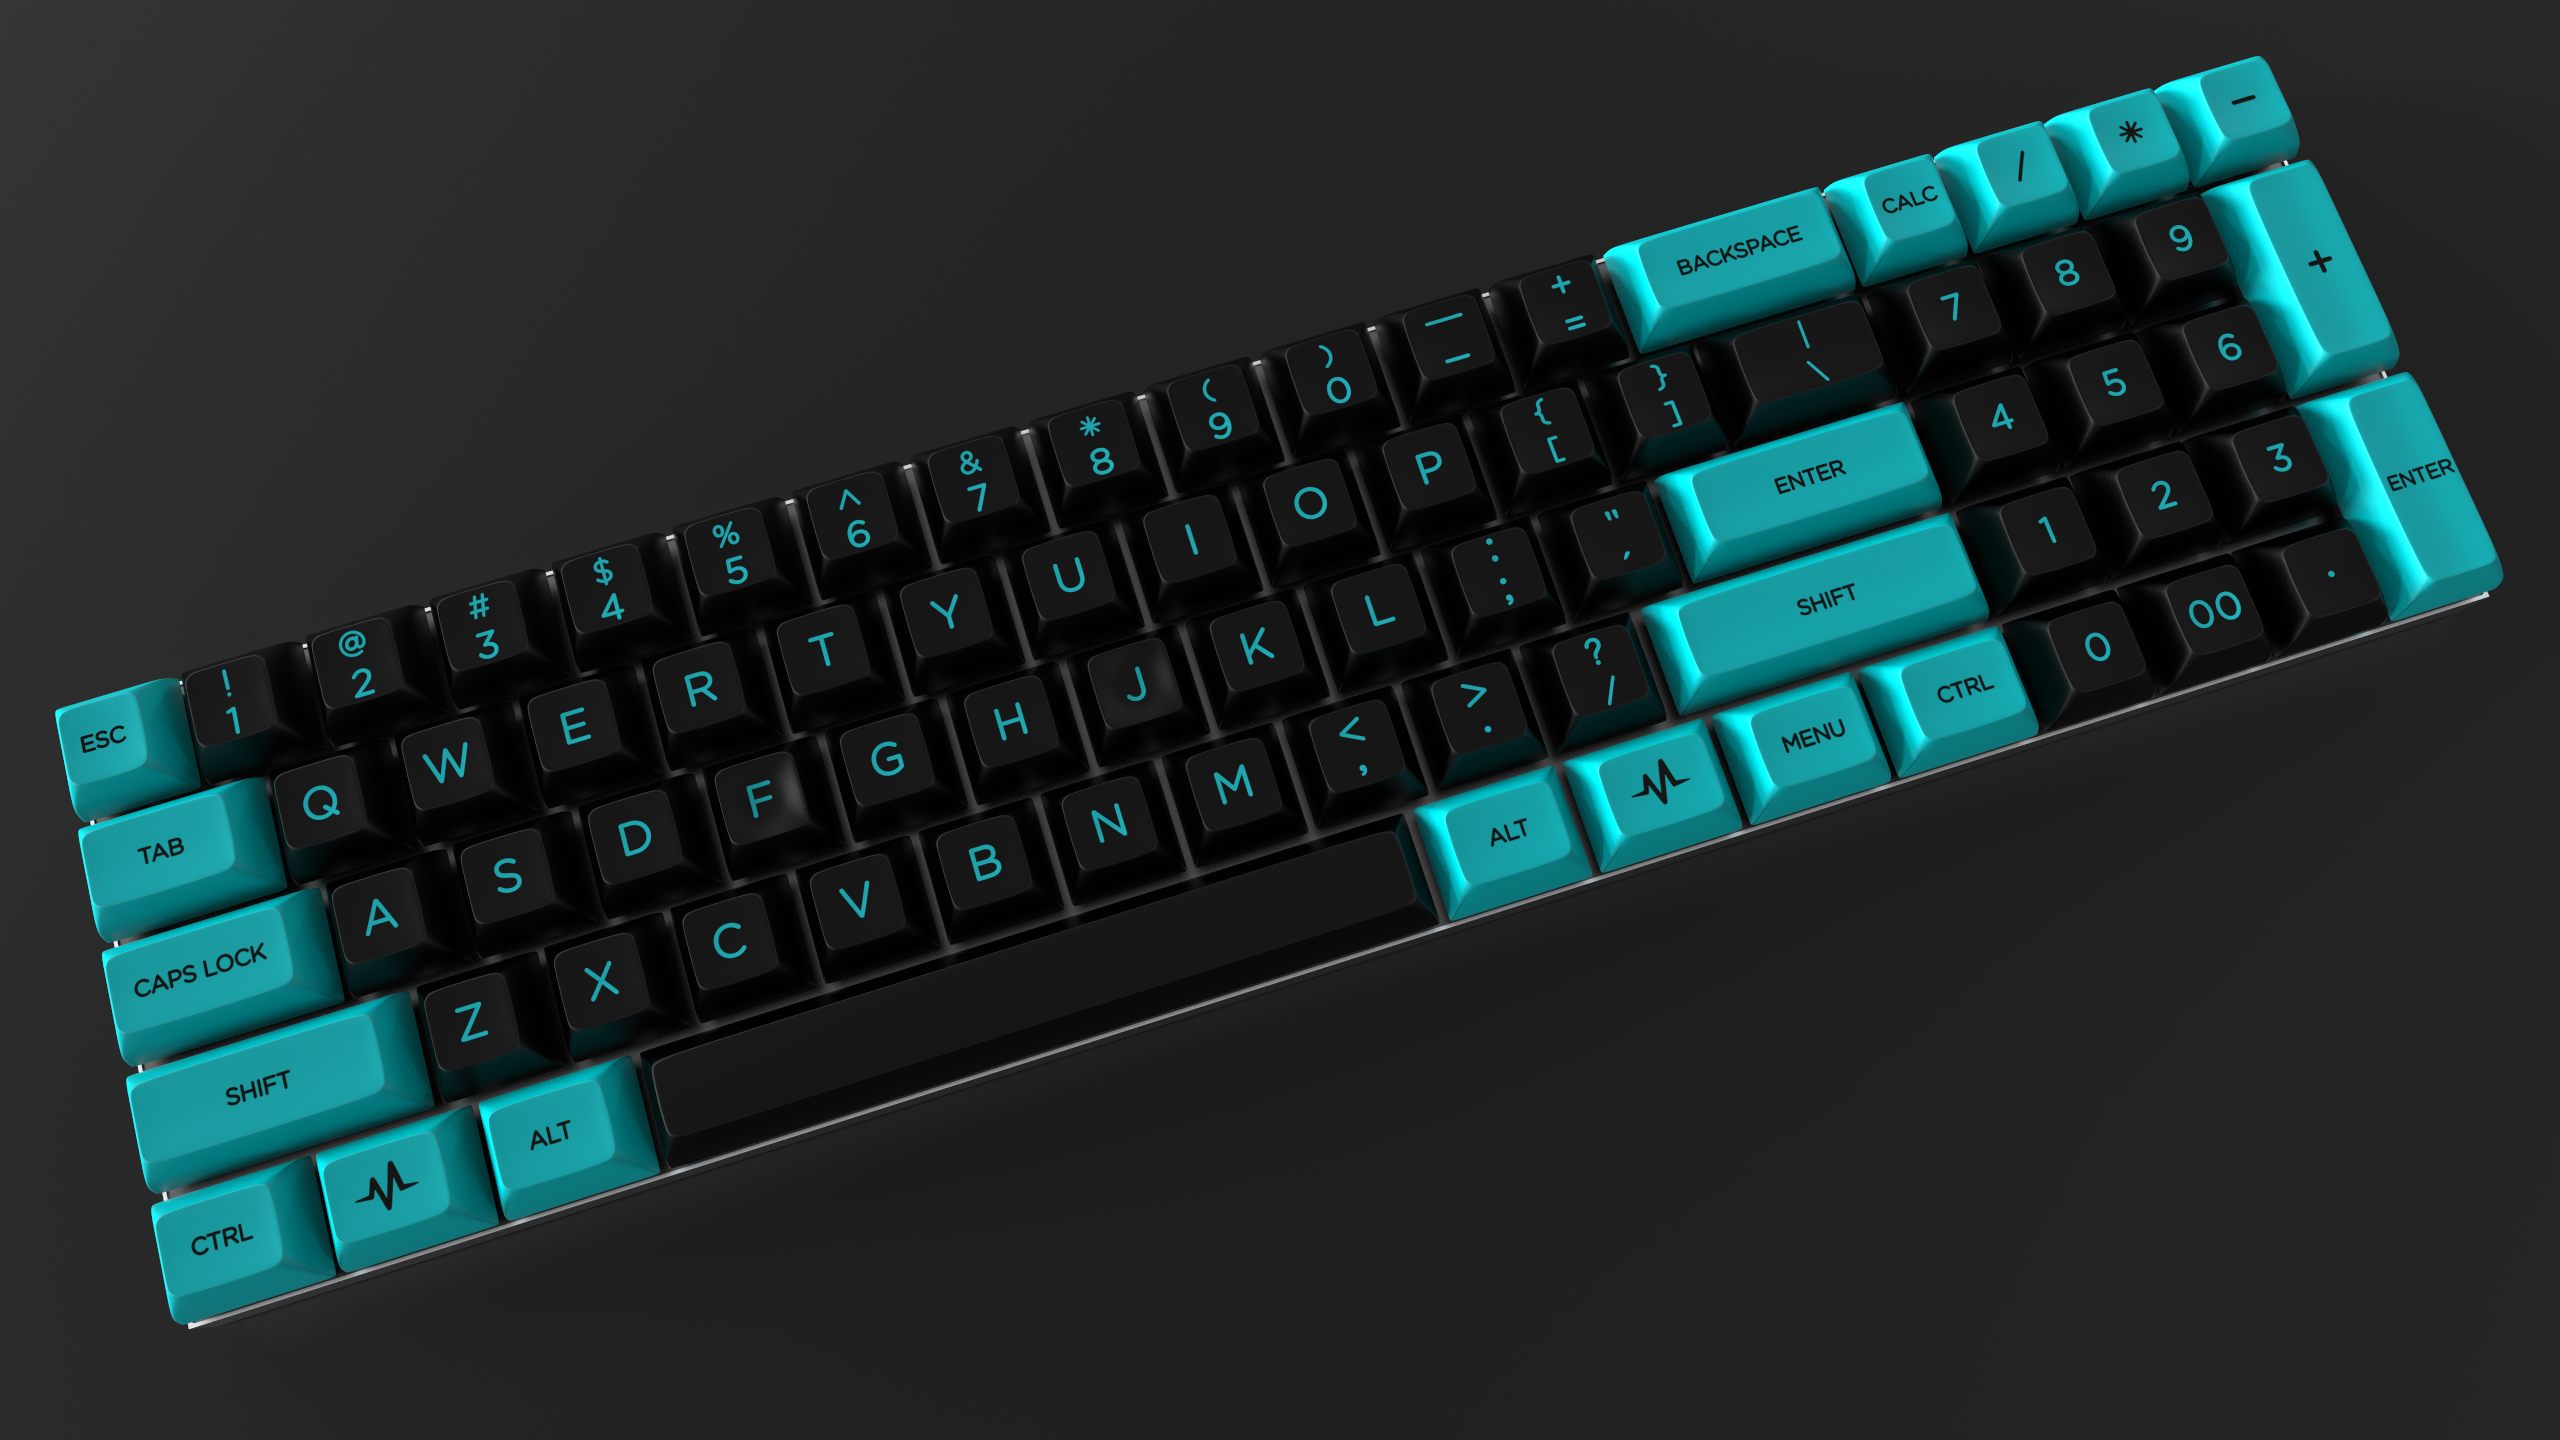
Tai-Hao Miami
Pulse (a 3D Rendering before Creation; this was from the initial Interest Check, which is a way of seeing how many people would be interested in potentially purchasing before any manufacturing and Group Buy plans happen)
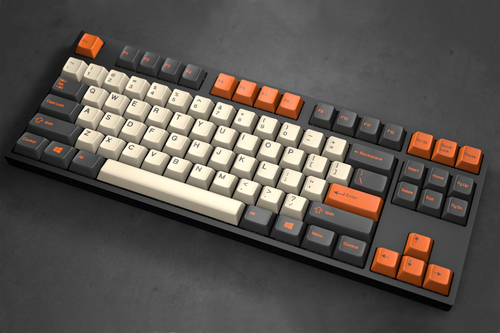
Carbon
Key Caps also come in different "Profiles", which can have an effect on Keycap Height and how they look when they're mounted onto the keyboard. The common ones found are: OEM, Cherry, DSA, and SA.
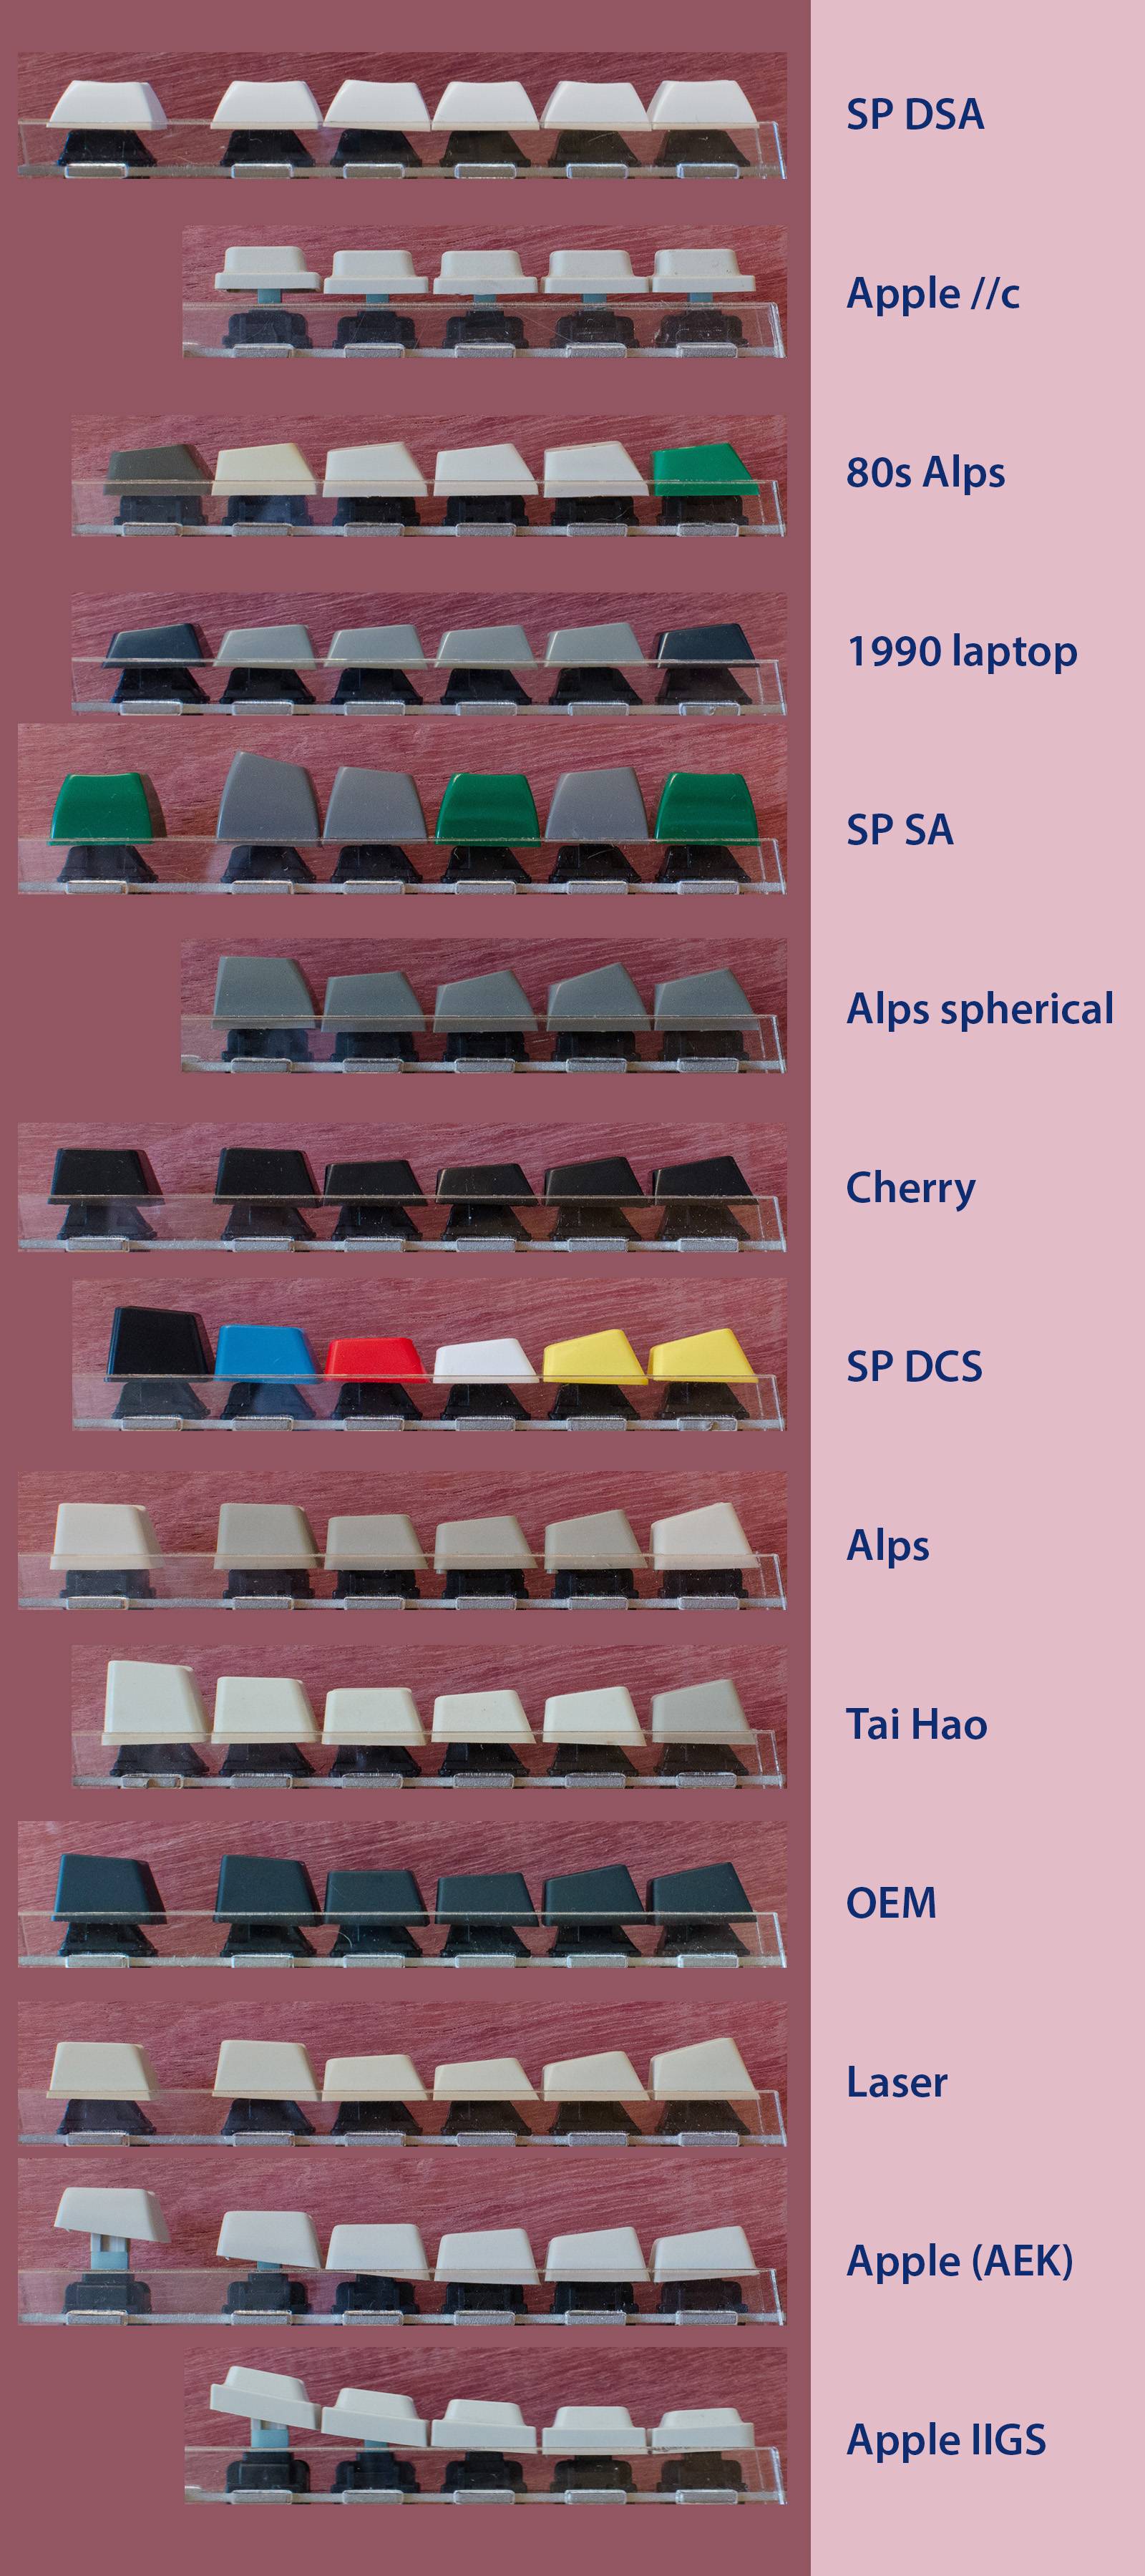
More info can be found Here: Keyboard profile - Deskthority wiki
There are also different plastics used (More info Here: Keycap material - Deskthority wiki). The most common is ABS which can develop a shine and yellow over time, but can be mitigated with something like retrobrite.
Some keys designed for Backlighting use a Doubleshot moulding process so the legends don't wear off. (The same is true for most non-backlit keys.)
Double-shot moulding - Deskthority wiki
Keycap Pullers
These are what are used to take off keycaps off the Switches. They come in 2 styles, wire based and plastic. Many find the wired Pullers to be more durable and tend to not scratch keycaps compared to their plastic counterparts.
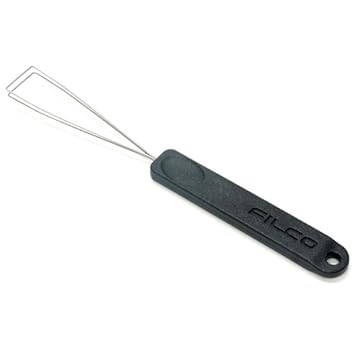
a Filco Wire Keycap Puller
A Plastic Keycap Puller
Cables
Many independent companies will offer to create sleeved cables, some of them quite exquisite looking as well.
Here is a "Dark Rainbow" coloured coiled cable from SwiftCables

and a purple Cable for a Form Factor I will cover in the next entry

Building your own
This can be one of the most easiest things to do if your skilled with a Soldering Iron already. If not, there are people throughout the Mechanical Keyboard Community who can provide Soldering/Building services.
The easiest way to go about this is to buy:
The Case
a Plate if you're going to use Plate Mount Switches; these come in either ANSI or ISO layout (more between the two here: ANSI vs ISO - Deskthority wiki)
PCB (must match your case of choice size wise)
Your Switches
Stabilizers
and Key Caps
There are also Kits you can buy that come with everything you need. The only thing you need to do is put it together and then use QMK to program it (if required).
The process is super simple as well.
Clip/Lube Stabilizers if you wish and then follow this video guide; the process is basically the same for both PCB & Plate Mount styles:
Next time I will talk about the different Form Factors of Keyboards.
Next entry:
Mechanical Keyboards (Entry 3): Keyboard Sizes
Previous entries:
Entry 1: Mechanical Keyboards (Entry 1): An Introduction
As apart of my first Entry, I briefly talked about the 3 "keyfeels" of Mechanical Switches and had some examples, along with a couple videos to explain in more detail.
Before I get more into this, I will say that many people on r/MechanicalKeyboards on Reddit who are just getting into the hobby will tend to ask "What is the Best Keyboard/Switch I can buy?". The question however is null as everything within this hobby is purely subjective so there is no such thing as "Best".
If you're unsure of what kind of Switch you want for your Keyboard, Switch Testers are the Answer. WASD and Max Keyboard offers a small selection, as does MechanicalKeyboards.com
A 9 key tester from WASD
Another important thing I should add well is Switches generally come in 2 Mounting Options. PCB Mount, and Plate Mount. PCB Mount uses 5 pins, while Plate uses 3 pins.
Here is a picture showing the differences with 2 Cherry MX Switches
If you ever accidentally buy PCB mount Switches for a Plate Mount keyboard, that can be remedied by using flush cutters and cutting off the 2 rear legs to make it a 3 pin (see the above photo for reference)
There are many companies that produce Mechanical Switches: Cherry, Gateron and Kailh (a subsidiary of Kaihua) are the 3 most Popular Brands that produce Mechanical Switches that people will go to. There are others such as Outemu, KBT, and Greetech that have their own Clones, along with Razer and their own in-house Switches, currently manufactured by Greetech. A Company based here in British Columbia, ZealPC, has his own Switches. Some switches have rubber dampeners on the Stem to help reduce sound when the stem hits the top and bottom of the switch housing.
Here's a 3D Render in GIF Form for a better picture of whats described:
(Source: Cherry MX Silent Red Switches)
Switches by Cherry found in many Pre-Built Keyboards will be Cherry MX Red, Blues or Browns, and often Silvers.
Some people will often lube their Switches to help make it be smoother then pressing and it can also help get rid of any additional noise.
Many use Kryotox lubricants as many of their products are rated for use on plastic and work perfectly. Another good alternative is SuperLube.
Here is a Deskthority page on it: Lubrication - Deskthority wiki
Many people will also clip and lube the Stabilizers for the longer keys (Spacebar, Shifts, Enter, and Backspace keys along with the +, 0 and Enter keys on the Numpad section if available) so they're quieter, as they generally rattle and make sound upon pressing down.
Here are a couple Youtube videos detailing how one can do both these from another favourite Youtuber of mine who deals with Mechanical Keyboards, Nathan Kim:
Customization
Here I'll dive into the Customization aspect, where Backlights, Underglow and Keycaps will fall into place.
Backlights
Many people prefer to have their keyboards backlit for easier reading at night or aesthetic purposes, or both. These are done with either LEDs which are typically 3mm in size or with SMD LEDs, both of which are soldered to the PCB. The LEDs are generally more popular as SMD LEDs are far tinier and require a more precise hand to solder. They can be either mono coloured or multicoloured or even RGB and can be controlled from either the Keyboard itself via programming if hand built or if bought from a company like Corsair, using special Software created by the company.
Underglow
Similar to above, however the only way to achieve this is by using 1.8mm LEDs and buying something such as KBDfans' Tina kit or Sentraqs own DIY kit and selecting the translucent case option. The glow can again be either mono coloured or RGB and be controlled by on-board programming using a program called QMK to program it to do these actions. (QMK is only for hand built boards and cannot be used with 3rd party keyboards, unless you switch out the controller board to something such as a Pro Micro and re-wire everything yourself)
Key Caps
This is where things get a little more interesting. Key Cap Sets are diverse and many are quite exotic looking, especially when it comes to Artisan Keycaps, which sound exactly as it is. People will typically use Resin to create their own Key Caps to sell. A popular Company that does this is called Jelly Key who host Group Buys (which is again exactly as it sounds; people sign up to get something and the person/people manufacture as many as there are signers and then send them out when its time which is generally several months ahead due to costs and manufacturing time)
Here is an example of several such Artisan Key Caps from Jelly Key from their Cosmos series.
Key Caps also come in regular looks as well. Here are a select personal favourites of mine:
Tai-Hao Miami
Pulse (a 3D Rendering before Creation; this was from the initial Interest Check, which is a way of seeing how many people would be interested in potentially purchasing before any manufacturing and Group Buy plans happen)
Carbon
Key Caps also come in different "Profiles", which can have an effect on Keycap Height and how they look when they're mounted onto the keyboard. The common ones found are: OEM, Cherry, DSA, and SA.
More info can be found Here: Keyboard profile - Deskthority wiki
There are also different plastics used (More info Here: Keycap material - Deskthority wiki). The most common is ABS which can develop a shine and yellow over time, but can be mitigated with something like retrobrite.
Some keys designed for Backlighting use a Doubleshot moulding process so the legends don't wear off. (The same is true for most non-backlit keys.)
Double-shot moulding - Deskthority wiki
Keycap Pullers
These are what are used to take off keycaps off the Switches. They come in 2 styles, wire based and plastic. Many find the wired Pullers to be more durable and tend to not scratch keycaps compared to their plastic counterparts.
a Filco Wire Keycap Puller
A Plastic Keycap Puller
Cables
Many independent companies will offer to create sleeved cables, some of them quite exquisite looking as well.
Here is a "Dark Rainbow" coloured coiled cable from SwiftCables
and a purple Cable for a Form Factor I will cover in the next entry
Building your own
This can be one of the most easiest things to do if your skilled with a Soldering Iron already. If not, there are people throughout the Mechanical Keyboard Community who can provide Soldering/Building services.
The easiest way to go about this is to buy:
The Case
a Plate if you're going to use Plate Mount Switches; these come in either ANSI or ISO layout (more between the two here: ANSI vs ISO - Deskthority wiki)
PCB (must match your case of choice size wise)
Your Switches
Stabilizers
and Key Caps
There are also Kits you can buy that come with everything you need. The only thing you need to do is put it together and then use QMK to program it (if required).
The process is super simple as well.
Clip/Lube Stabilizers if you wish and then follow this video guide; the process is basically the same for both PCB & Plate Mount styles:
Next time I will talk about the different Form Factors of Keyboards.
Next entry:
Mechanical Keyboards (Entry 3): Keyboard Sizes
Previous entries:
Entry 1: Mechanical Keyboards (Entry 1): An Introduction